
ここでは、文章の読み上げを試します。読み上げで作成した音声ファイルを再生します。
読み上げ文章の作成は、Webスクレイピングで編集した、ニュース、天気予報を読み上げて再生します。
ダイソー「USBミニスピーカー 3W×2」です。audioジャックに接続してください。
Google翻訳の読み上げgTTS (Google Text-to-Speech)ライブラリをインストールします。
読み上げた内容の音声ファイルを作成して再生いたします。プログラム(speech.py)は下記の通りです。
from gtts import gTTS
from pydub import AudioSegment
from pydub.playback import play
import sys

def speechja(stext):
    tts = gTTS(stext, lang="ja")
    tts.save("/home/pi/tom/out.mp3")

    sound = AudioSegment.from_mp3("/home/pi/tom/out.mp3")
    play(sound)

if __name__ == "__main__":
    args = sys.argv
if len(args) == 2 :
        msg = args[1]
    else :
        msg = "読み上げ文書を指定してください"
    print(msg)
speechja(msg)
コマンドラインより、引数に読み上げ文章を指定して実行してください。 「python3 speech.py "読み上げ文章を指定してください。"」
WebスクレイピングはWeb上から特定のデータを取得し、利用しやすく加工することです。
独自のプログラムを作成することで、取得したいWeb上の情報を自動で取得・加工できるようになります。
requestsとBeautifulSoupを事前にインストールしておく必要があります。
※Pythonではclassは予約語なのでそれと区別するためアンダースコアを付ける必要があります。
以下、サンプルコードです。
    url = "https://取得するURLを指定する.html"
    data = urllib.request.urlopen(url) # HTMLを取得する。
    soup = BeautifulSoup(data, 'html.parser') # HTMLを解析して取得
    soup = soup.find(class_="xxxx") # classが 'xxxx' のタグを取得
    text1 = soup.find_all("zzz") # タグ名が 'zzz' のすべてタグを取得
    data1 = text1[0].text #リストの1番目のテキストを取得
    data2 = text1[1].text #リストの2番目のテキストを取得
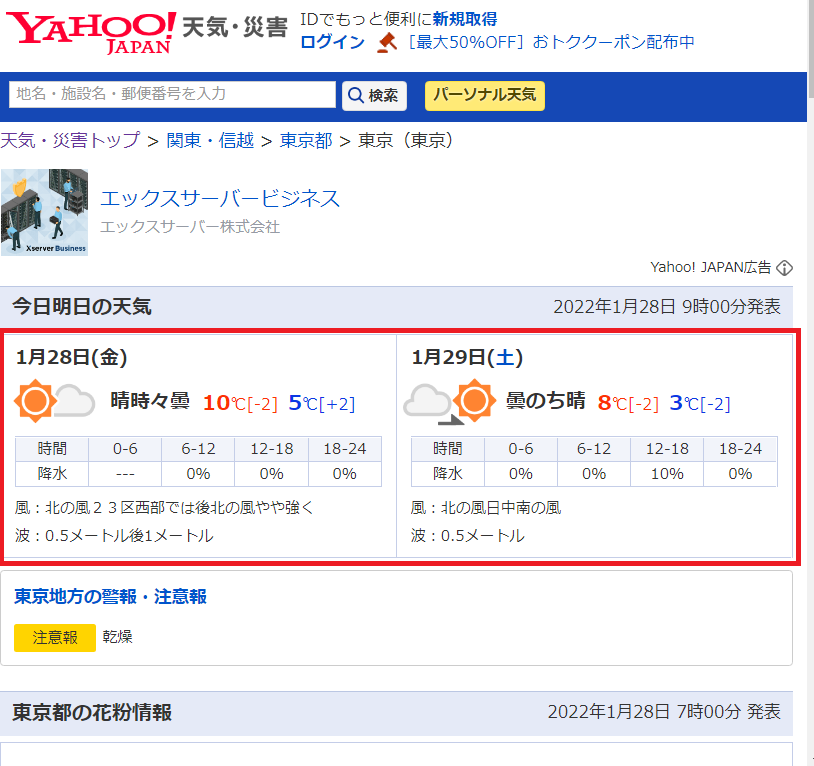
yahoo天気・災害のページから東京都の天気予報表示ページを選択して、今日明日の天気情報をスプレイピングして、読上げます。
プログラム(yweathe.py)は下記の通りです。
# -*- coding: utf-8 -*-
import urllib.request
from bs4 import BeautifulSoup
import re
import os
from gtts import gTTS
from pydub import AudioSegment
from pydub.playback import play
import speech

def gettext():
    # Yahoo!のページから水戸の天気を開く
    url = "https://weather.yahoo.co.jp/weather/jp/13/4410.html" #東京
    data = urllib.request.urlopen(url)

    # HTMLを解析して取得
    soup = BeautifulSoup(data, 'html.parser')

    # classが 'forecastCity' のタグを取得
    tenkiAll = soup.find(class_="forecastCity")

    date = tenkiAll.find_all(class_="date")

    tenki = tenkiAll.find_all(class_="pict")
    high = tenkiAll.find_all(class_="high")
    low = tenkiAll.find_all(class_="low")

    # 天気をしゃべるテキストを設定
    weatherText =  "Yahoo天気情報。東京都。"
    weatherText += "今日、{}は、{}。".format(date[0].text, tenki[0].text)
    weatherText += "最高気温は、{}度、".format(high[0].find("em").text)
    weatherText += "最低気温は、{}度、です。".format(low[0].find("em").text)

    weatherText += "明日、{}は、{}。".format(date[1].text, tenki[1].text)
    weatherText += "最高気温は、{}度、".format(high[1].find("em").text)
    weatherText += "最低気温は、{}度、です。".format(low[1].find("em").text)

    # 改行・空白文字を消す
    weatherText = re.sub('\n| ', '', weatherText)
    return str(weatherText)

if __name__ == "__main__":
    wText = gettext()
    print(wText)
    speech.speechja(wText)
コマンドラインより「$ python3 yweather.py」で実行してください。
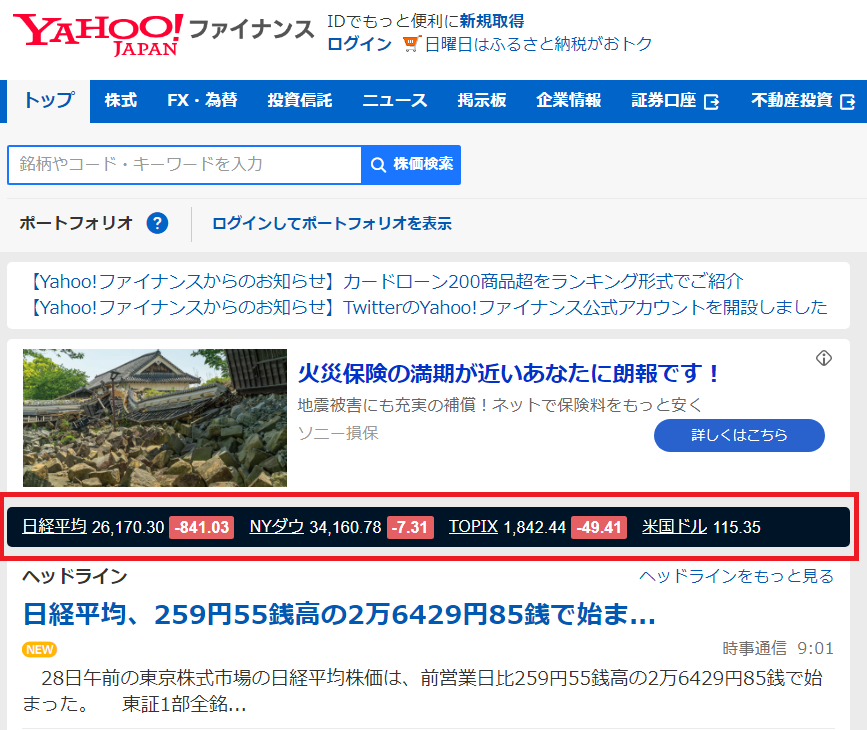
yahooファイナンスの市況状況をスプレイピングして、日経平均、NYダウ、TOPIX、米国ドルの状況を読上げます。
プログラム(yfinance.py)は下記の通りです。
import urllib.request
from bs4 import BeautifulSoup
import re
from gtts import gTTS
from pydub import AudioSegment
from pydub.playback import play
import speech

def gettext():
    # ヤフーファイナンスのトップページ情報を取得する
    url = "https://finance.yahoo.co.jp/"
    data = urllib.request.urlopen(url)
    # HTMLを解析して取得
    soup = BeautifulSoup(data, 'html.parser') # HTMLデータの取得
    soup = soup.find(class_="c2G1960w") # 該当クラスの取得
    suu = soup.find_all(class_="_3rXWJKZF") # 数字の表示クラスをすべて取得

    # それぞれの数値項目を取得してテキスト変換する。
    suu11 = suu[0].text # 日経平均
    suu12 = suu[1].text # 差
    suu21 = suu[2].text # NYダウ
    suu22 = suu[3].text # 差
    suu31 = suu[4].text # TOPIX
    suu32 = suu[5].text # 差
    suu4  = suu[6].text # 円/ドル

    shisuu = "本日の日経平均は、"+suu11+"円で、"+suu12+"円です。"
    shisuu = shisuu +"ニューヨークダウは、"+suu21+"$で、"+suu22+"$です。"
    shisuu = shisuu +"トピックスは、"+suu31+"円で、"+suu32+"円です。"
    shisuu = shisuu +"イチ米国ドルは、"+suu4+"円です。"
    shisuu = shisuu.replace('-', 'マイナス、')
    shisuu = shisuu.replace('+', 'プラス、')
    return str(shisuu)

if __name__ == "__main__":
    financeText = gettext()
    print(financeText)
    speech.speechja(financeText)
コマンドラインより「$ python3 yfinance.py」で実行してください。
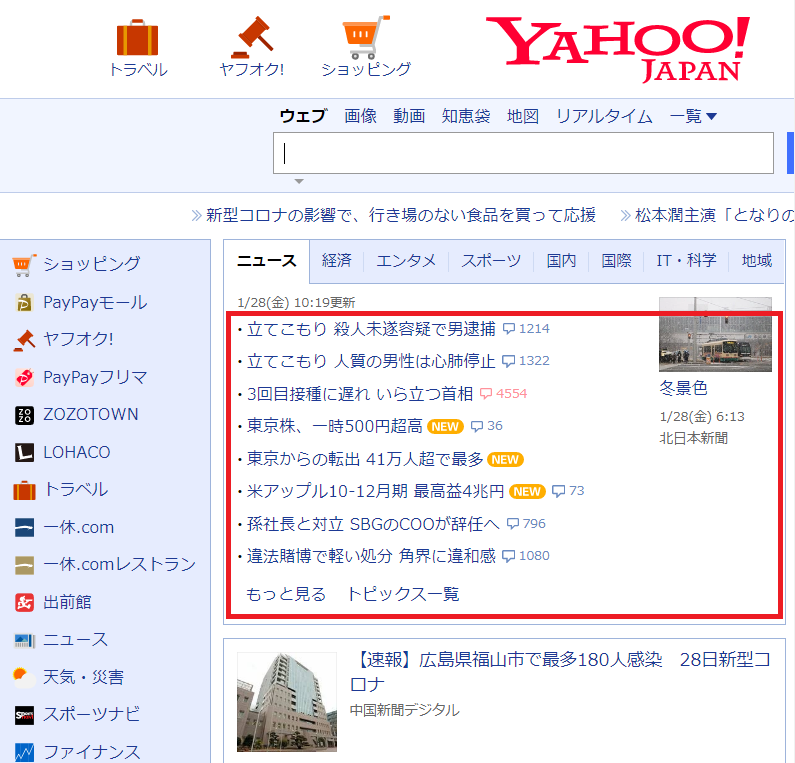
yahooトップページからニュース見出し情報をスプレイピングして、読上げます。
プログラム(ynews.py)は下記の通りです。
import requests
from bs4 import BeautifulSoup
import re

from gtts import gTTS
from pydub import AudioSegment
from pydub.playback import play
import speech
def ply():
    # ヤフーニュースのトップページ情報を取得する
    URL = "https://www.yahoo.co.jp/"
    rest = requests.get(URL)

    # BeautifulSoupにヤフーニュースのページ内容を読み込ませる
    soup = BeautifulSoup(rest.text, "html.parser")

    # ヤフーニュースの見出しとURLの情報を取得して出力する
    data_list = soup.find_all(href=re.compile("news.yahoo.co.jp/pickup"))
    for data in data_list:
        news = data.span.string
        print(news)
        speech.speechja(news)
#       print(data.attrs["href"])

if __name__ == "__main__":
    ply()
コマンドラインより「$ python3 ynews.py」で実行してください。
crontab -eでプログラムを定時実行する
crontabを編集するエディタを変更するには$ select-editorで変更する。
https://www.raspberrypirulo.net/entry/cron
Cronが動いているか確認する 上記のステータス確認のコマンドでCronが動いているか確認してみます。 「$ sudo systemctl status cron」
正常に動いていれば”Active”のところが”active (running)”になっています。
動作していなければ「$ sudo systemctl start cron」で、開始します。
cronログが出力されるようにしておくと、問題解決に役立ちます。 「$ sudo nano /etc/rsyslog.conf」コマンドで、rsyslog.confを編集して、ログが出るようにします。
#cron...となっている部分の#を削除して、再起動します。
#
# First some standard log files.  Log by facility.
#
auth,authpriv.*                 /var/log/auth.log
*.*;auth,authpriv.none          -/var/log/syslog
cron.*                          /var/log/cron.log
daemon.*                        -/var/log/daemon.log
kern.*                          -/var/log/kern.log
lpr.*                           -/var/log/lpr.log
mail.*                          -/var/log/mail.log
user.*                          -/var/log/user.log
これで、/var/log/cron.logにログファイルが生成されるようになります。
cronで設定したジョブの実行結果を、system ログに出力させます。
* * * * * /usr/local/bin/myjob 2>&1 | logger -t mycommand -p local0.info